


No-knead bread buns with seeds and wholewheat flour – the recipe step by step, presented in detail, with many small helpful details for perfect success. No-knead bread dough with wholewheat flour and seeds, detailed preparation method and list of ingredients.
When I first heard about no-knead bread, I had some doubts. More conservative by nature, I couldn’t believe that the product obtained as a result of this process could satisfy me. However, when I came to read the recipe of Jim Lahey, the creator of this type of bread, my curiosity did not give me peace and I had to try it. It was just a first step! After a while, I started to adjust and adjust the procedure so that I would get different results. The recipe for these no-knead multiseeds buns with whole wheat flour, which I propose to you today, is my last approach to this ingenious baking process.

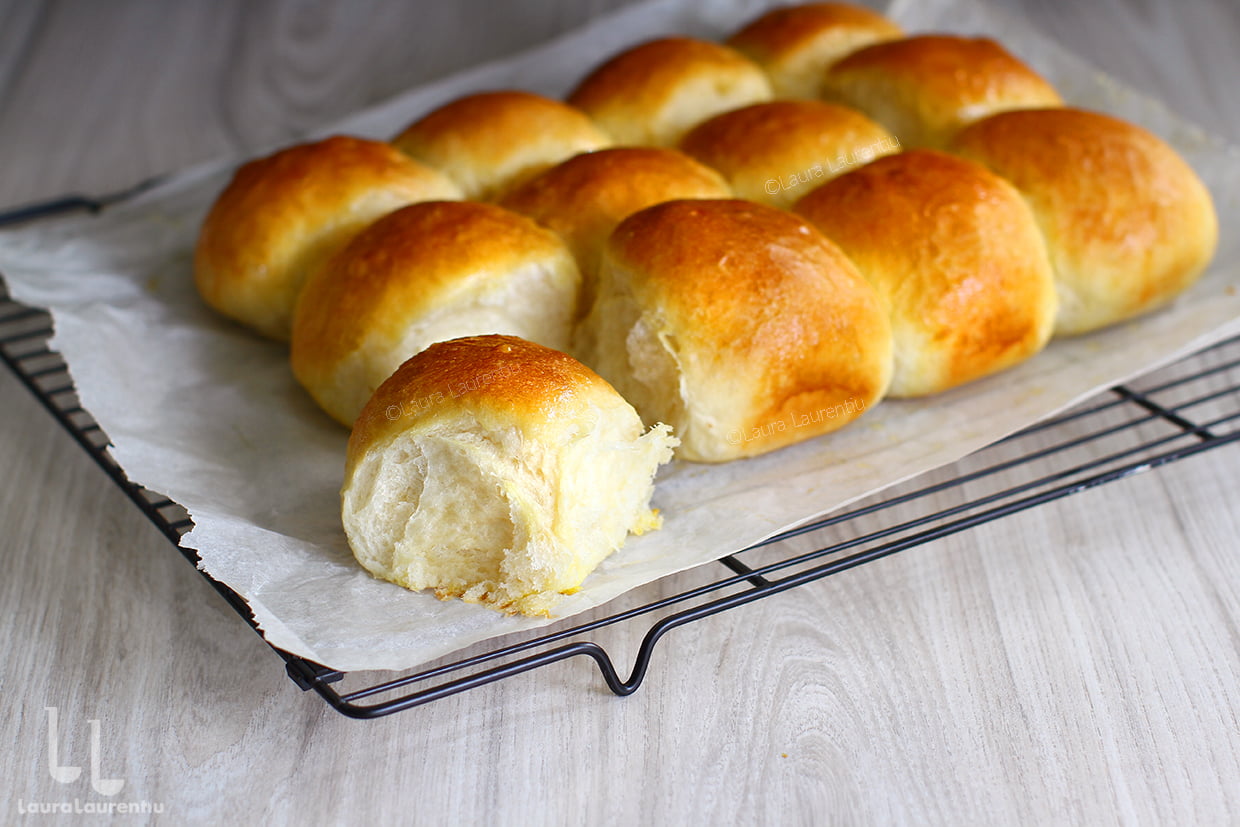
Another recipe for no-knead bread, this time some wonderful milk buns, can be found by clicking on the picture below.
Now, lets return to the recipe for bread buns with seeds and whole wheat flour.
In particular, I would like to wholeheartedly recommend them. They have a great texture, they are fluffy, they have crispy crust without being hard and especially they have a superb taste!
You’ve will notice that these buns are ready in a relatively short amount of time. The truth is that we won’t be working with them for more than 30 minutes. However, several hours of waiting are added to this active time. It is a yeast-free dough, which obviously means a better taste. However, as a result of this, the dough will take a long time to develop properly. The taste and texture of the buns, on the other hand, will fully compensate us! I mentioned that I began making them in the evening so that they would be ready to bake the next morning.
Ingredients for Buns with Seeds and wholewheat Flour
No-Knead Bread Buns with seeds and Whole Wheat Flour
Materials
Notes
Nutrition
No-Knead Bread Buns with Seeds and Whole Wheat Flour – Method
1. The first thing I did was to weigh the seeds in a bowl. Notice, I use a mixture of several types of seeds. You may use only one type, whichever you like more. I used 40 grams of seeds, ie 10% of the total amount of flour used (white + whole wheat). In my opinion, it is enough. This quantity is just enough to give taste and texture. More than that would disturb the development of the gluten in the dough and increase the caloric content of the bread unnecessarily. Because, yes, seeds are very high in calories!
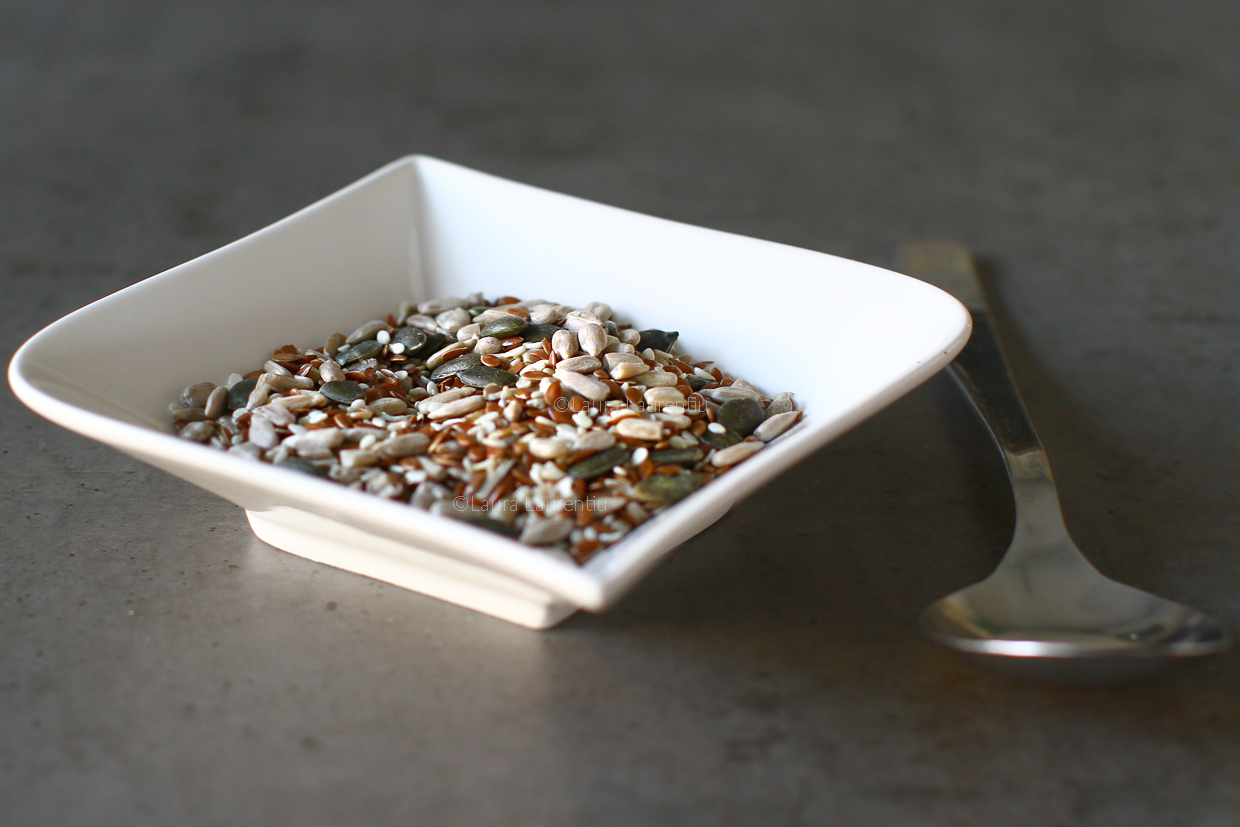
2. The second step: moisturizing the seeds. I do not recommend using dry seeds in any dough! Why? Because they will absorb the moisture of the dough and a drier bread will come out, implicitly less fluffy. So pour about 100 ml of water – other than the recommended water for kneading the dough – over the seeds and leave them aside for about an hour. They can be left in the fridge overnight.

Activation of the Yeast
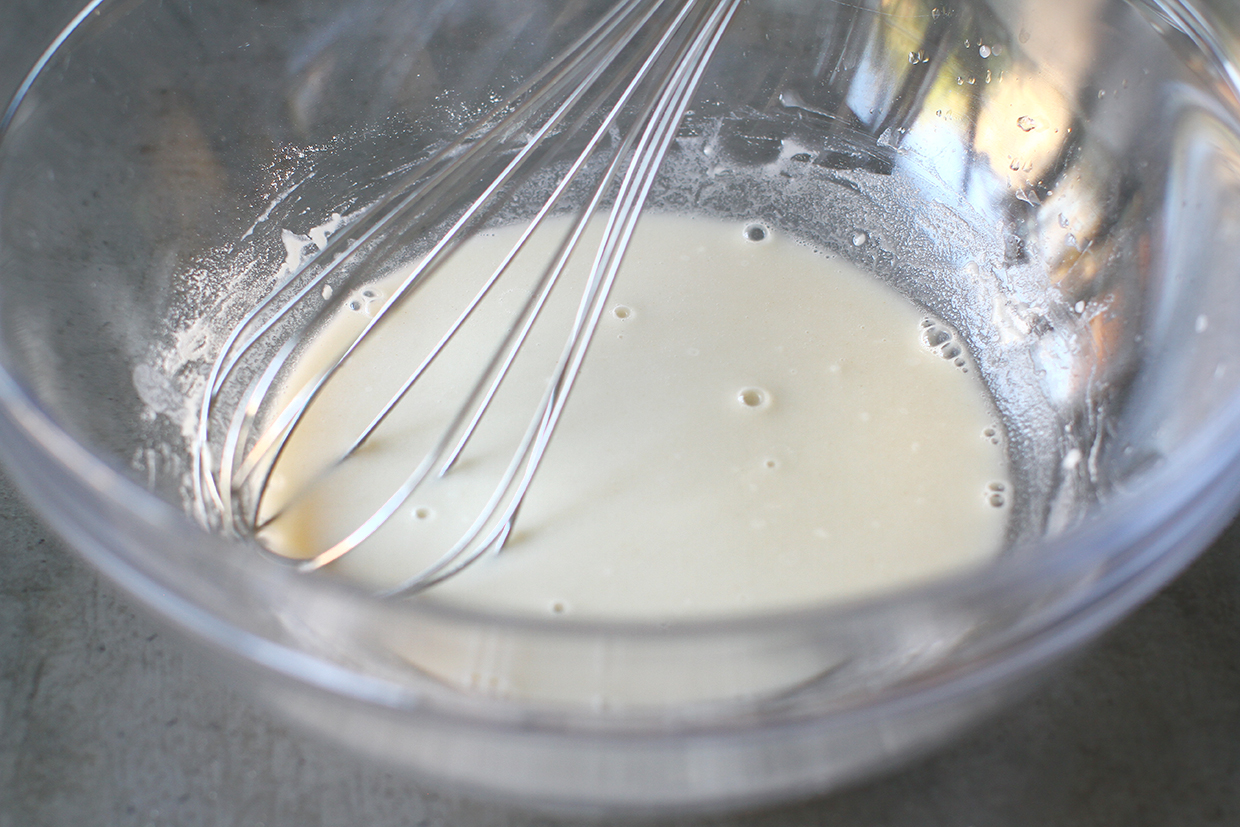
3. In a large bowl, I weighed the sugar and 2 grams of dry yeast. The amount is 1/3 of a sachet (7 grams) of dry yeast. If you use fresh yeast, crush 6 grams of yeast in the bowl.

4. I added 30 grams of the white flour to the bowl and mixed it well with the whisk. Over the yeast mixed with sugar and flour, I poured about 50 ml. of lukewarm water of the total amount of water recommended for kneading (290 ml). I beat a little with the whisk, to homogenize everything. I set the bowl aside for 15 minutes at room temperature. At the end of this time, the yeast should make some bubbles, but not many, because it is a very small amount.
Mixing the Ingredients
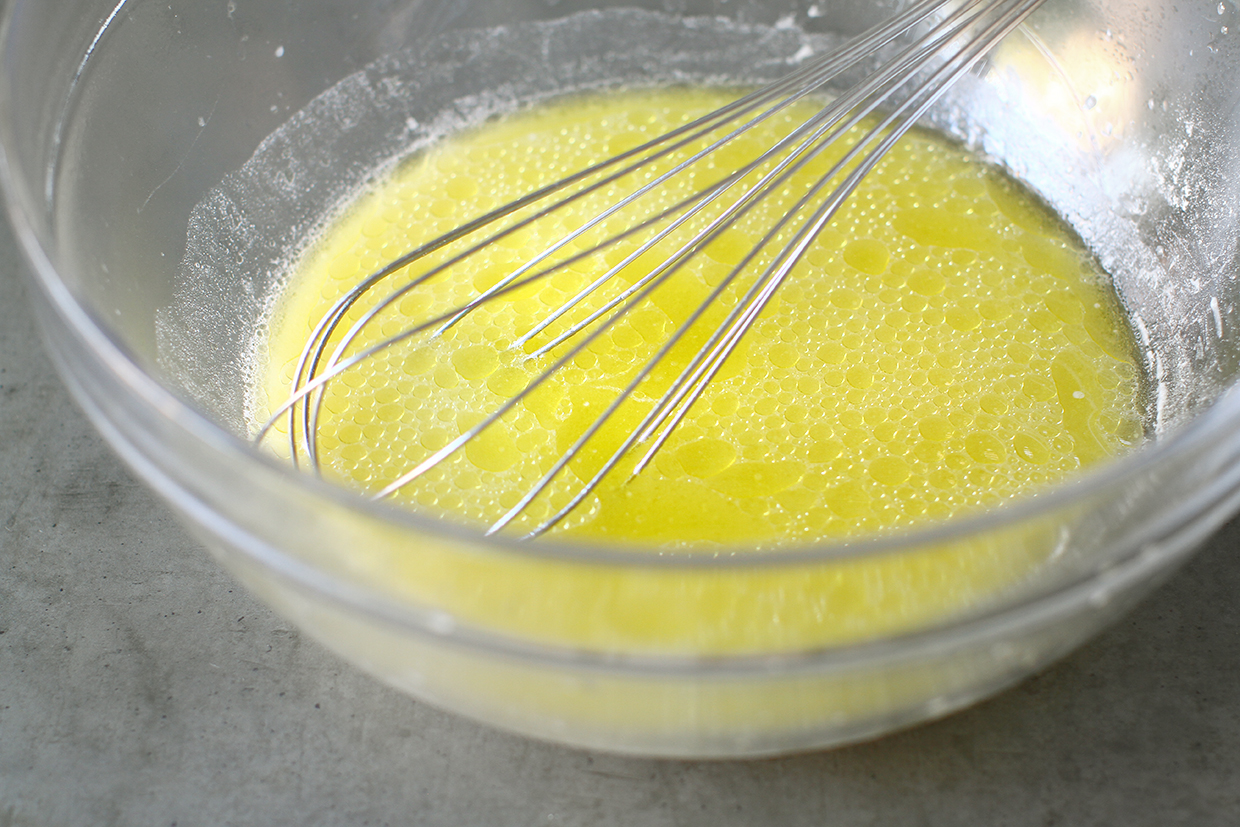
5. I poured the remaining lukewarm water and olive oil over the activated yeast. I mixed them well with the whisk.
6. Separately, in a bowl, I mixed the two types of flour and salt. The recommended 8 grams of salt represents 2% of the amount of flour, ie the minimum recommended for bread. It is possible to add a little more (2.5-3%) if you like saltier bread, but less in any case not. Not only would the bread be tasteless, but it would also affect the leavening process. I added the flour mixed with the salt over the liquid in the bowl.
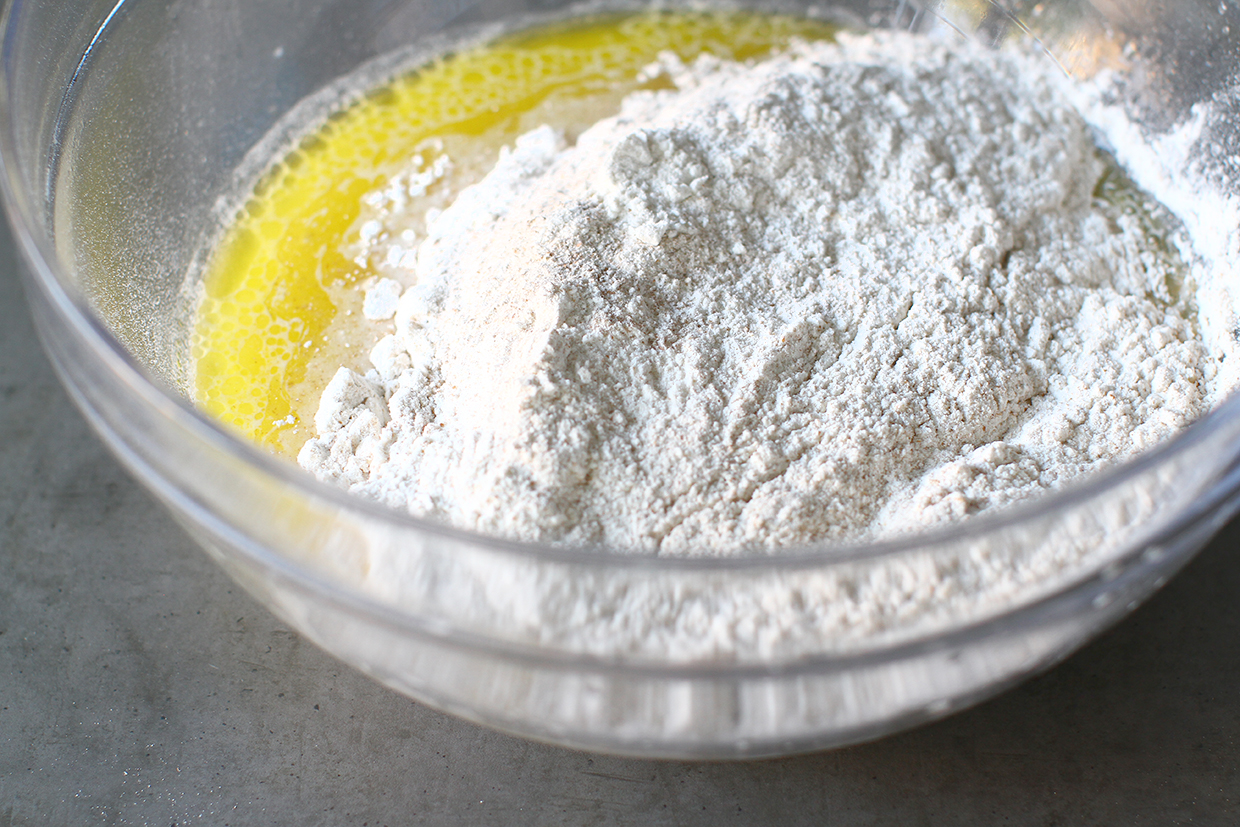
7. I drained the seeds through a sieve of the unabsorbed water and added them to the bowl.

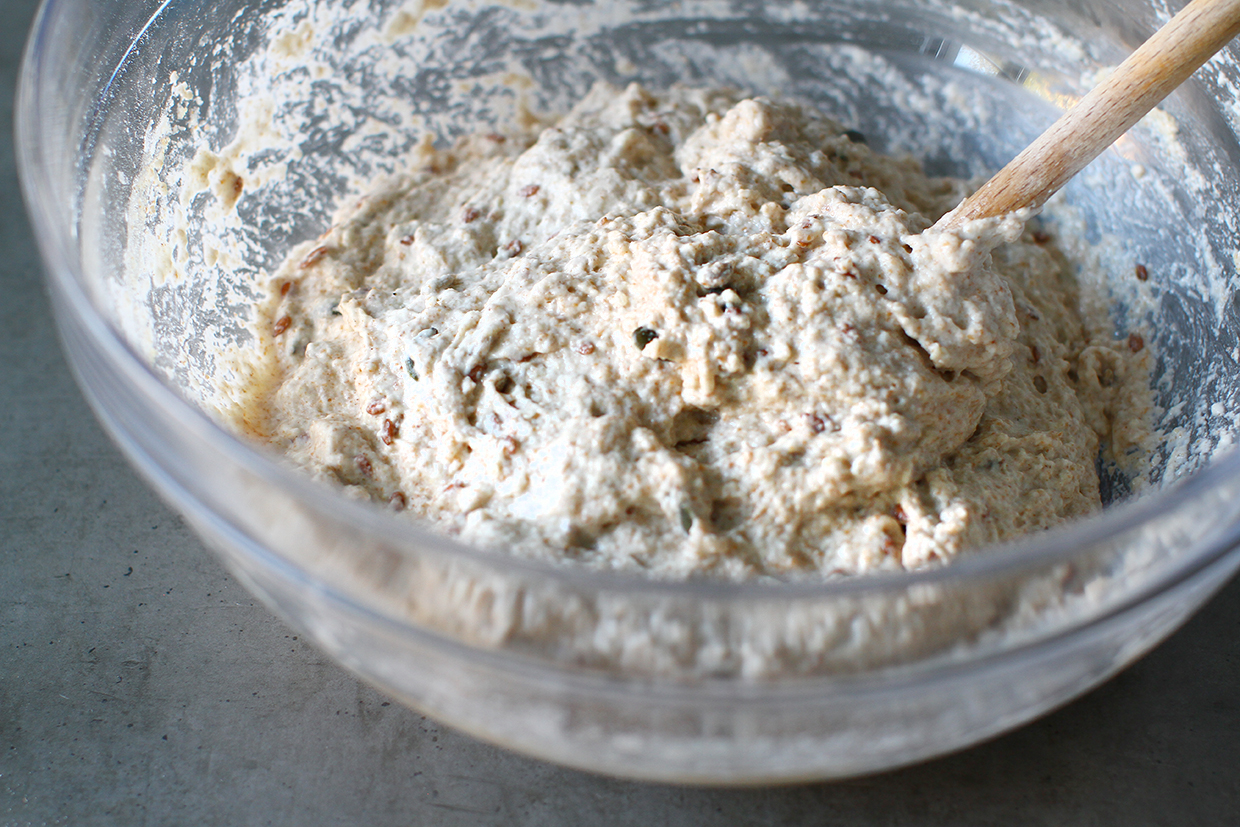
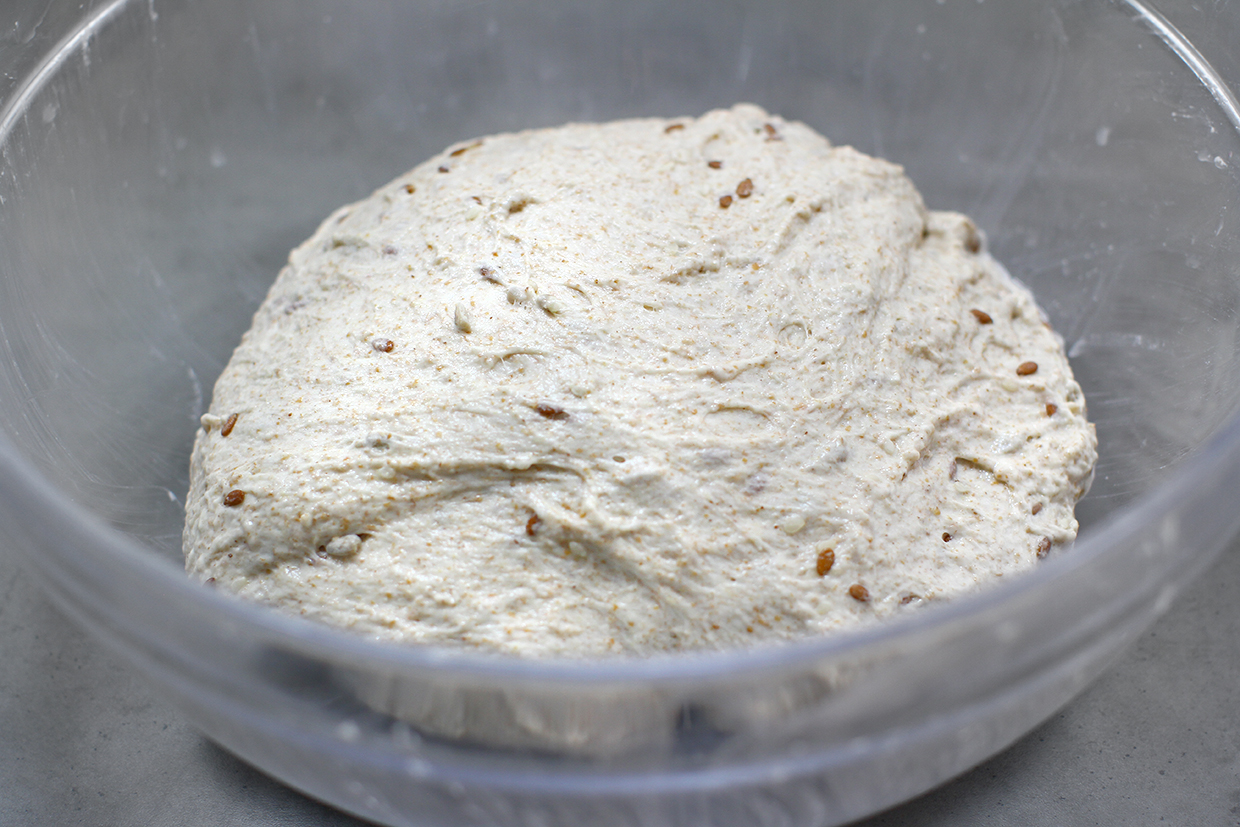
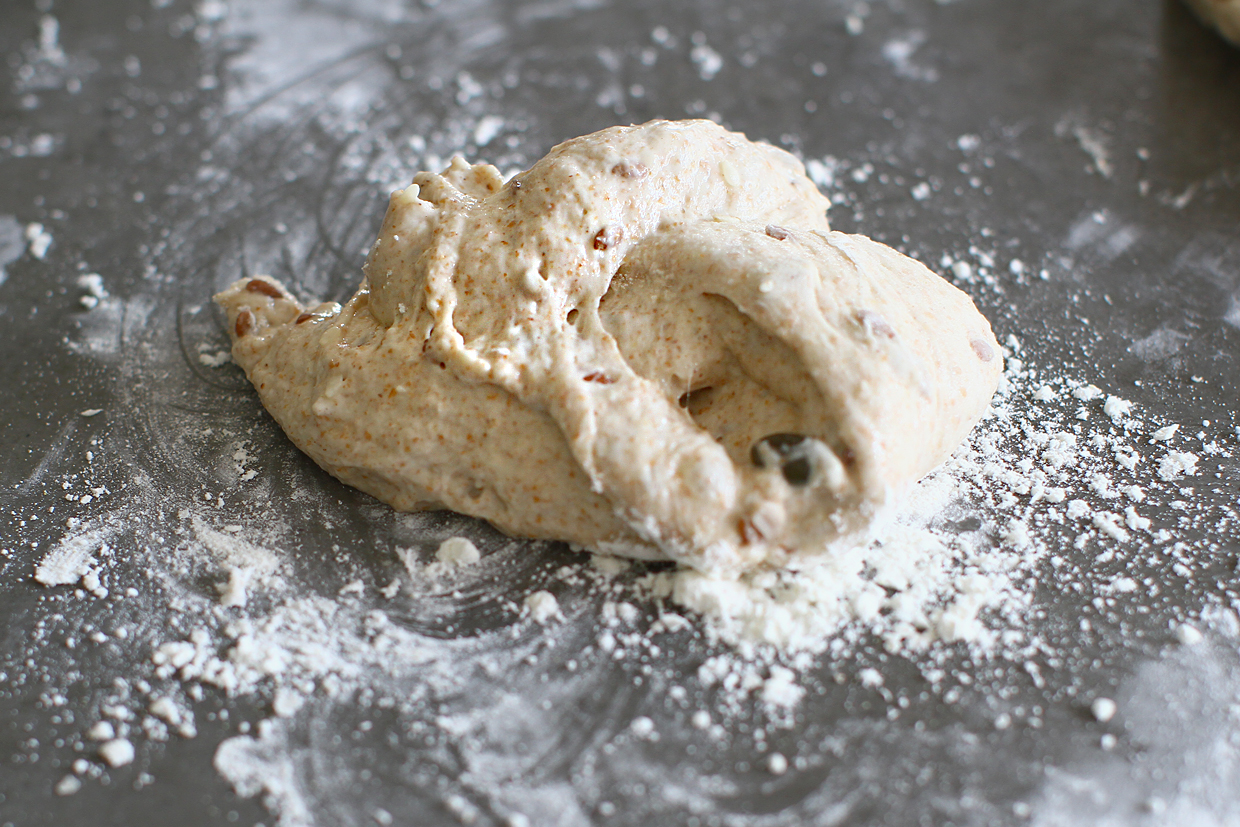
8. With a wooden spoon, I mixed the ingredients vigorously until I saw no traces of dry flour. Mixing should not take more than 1-2 minutes. I got a wet paste, as seen in the picture below. I covered the bowl with cling film and set it aside for 60 minutes at room temperature.
Two successive folds
9. After 1 hour, with the help of a plastic scraper, I detached the dough that was holding the bowl, pushing it into place. With the help of a scraper, I brought the dough from the bottom of the bowl on top, as if I had folded it, at the same time turning the bowl slightly. I repeated the process until I got an approximate ball of dough, as seen in the picture below.
10. I wrapped the bowl with the dough again and left it at room temperature for another hour. After this time, I repeated the procedure described at point 9. I wrapped the dough bowl well and put it in the fridge overnight (for 8 hours).
Shaping the leavened dough
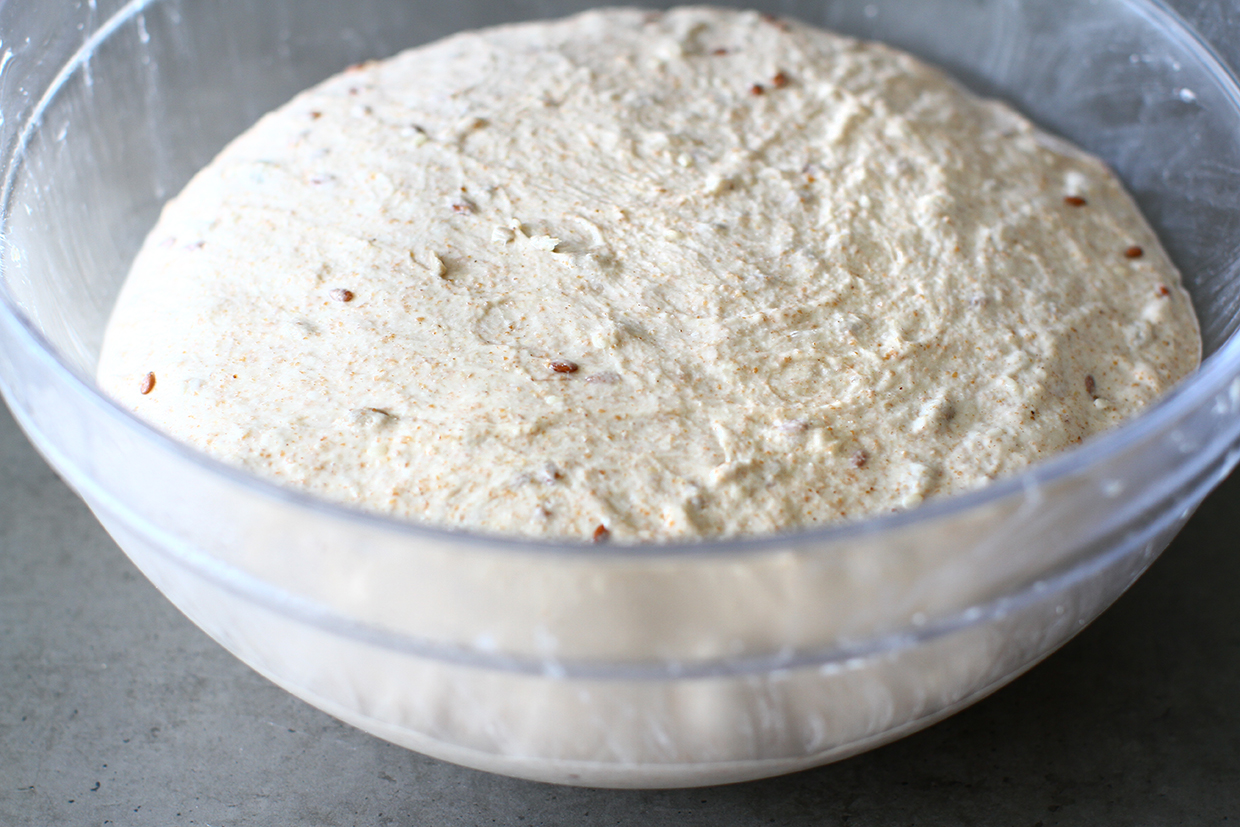
11. The next day, the dough for the buns with seeds and wholewheat flour rose nicely, almost filling the bowl.
12. I sprinkled the dough with a little food starch on the whole surface, then I pushed it with my fist, eliminating the big air bubbles. I prefer to use starch for sprinkling, lately, because I noticed that it is more effective in preventing the dough from sticking to the work surface, but it also works with flour.

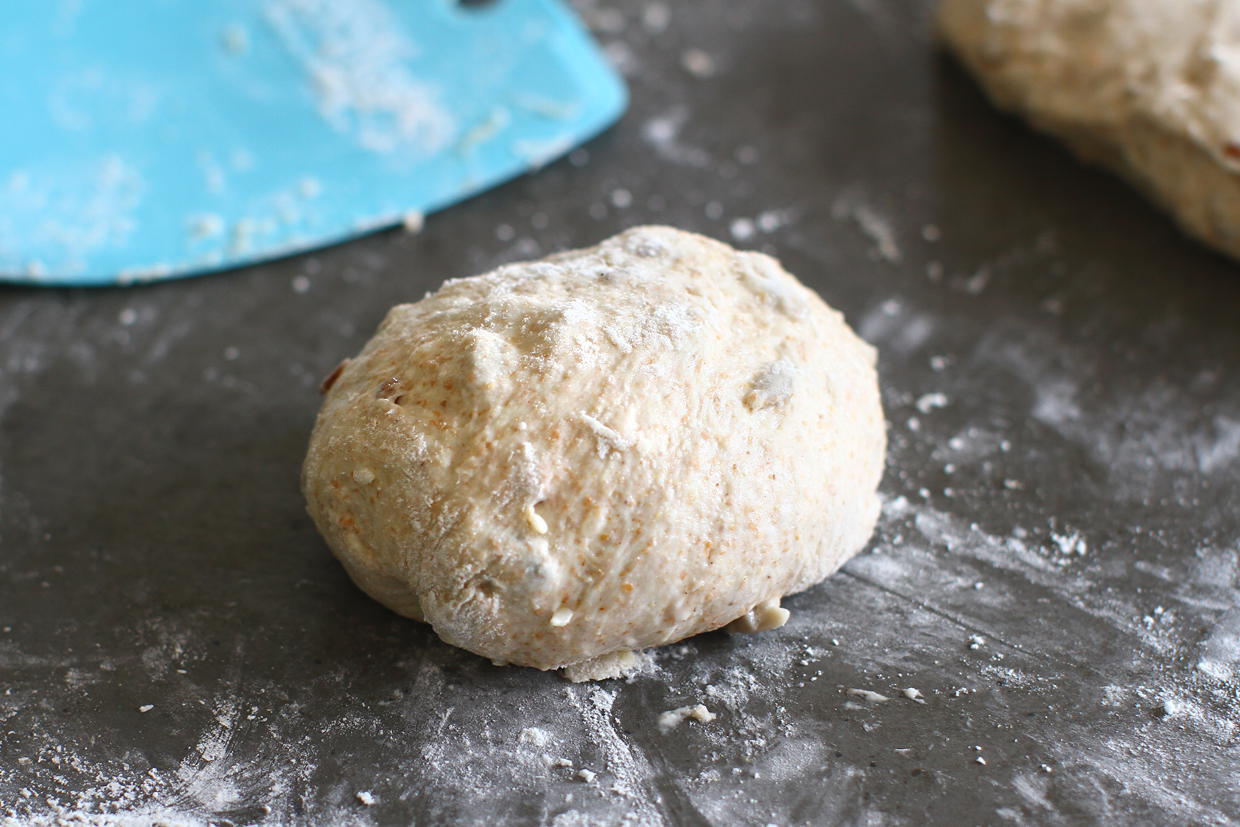
13. With a plastic scraper, I detached the dough from the bowl, all around, and turned it over on the work surface. As you can see in the next picture, it is damp and shapeless. I’ll fix this right away!

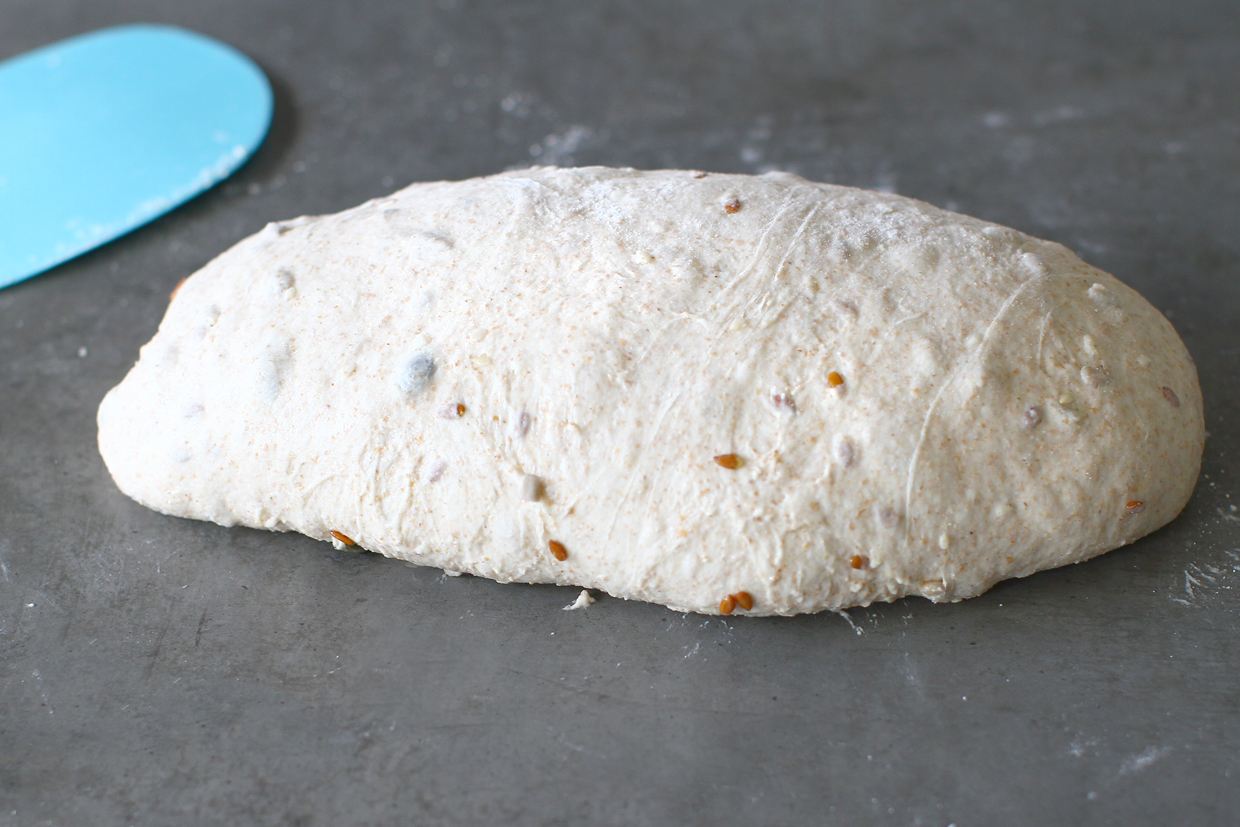
14. My goal is to no longer see this damp, sticky dough. So I grab the dough’s edges, lift and fold, lightly pressing, so that the surface sprinkled with flour or starch is on top. I keep doing these folds until I get a tense loaf. As you can see in the image below, my dough is now properly shaped!
Modeling the no-knead bread buns with seeds and whole wheat flour
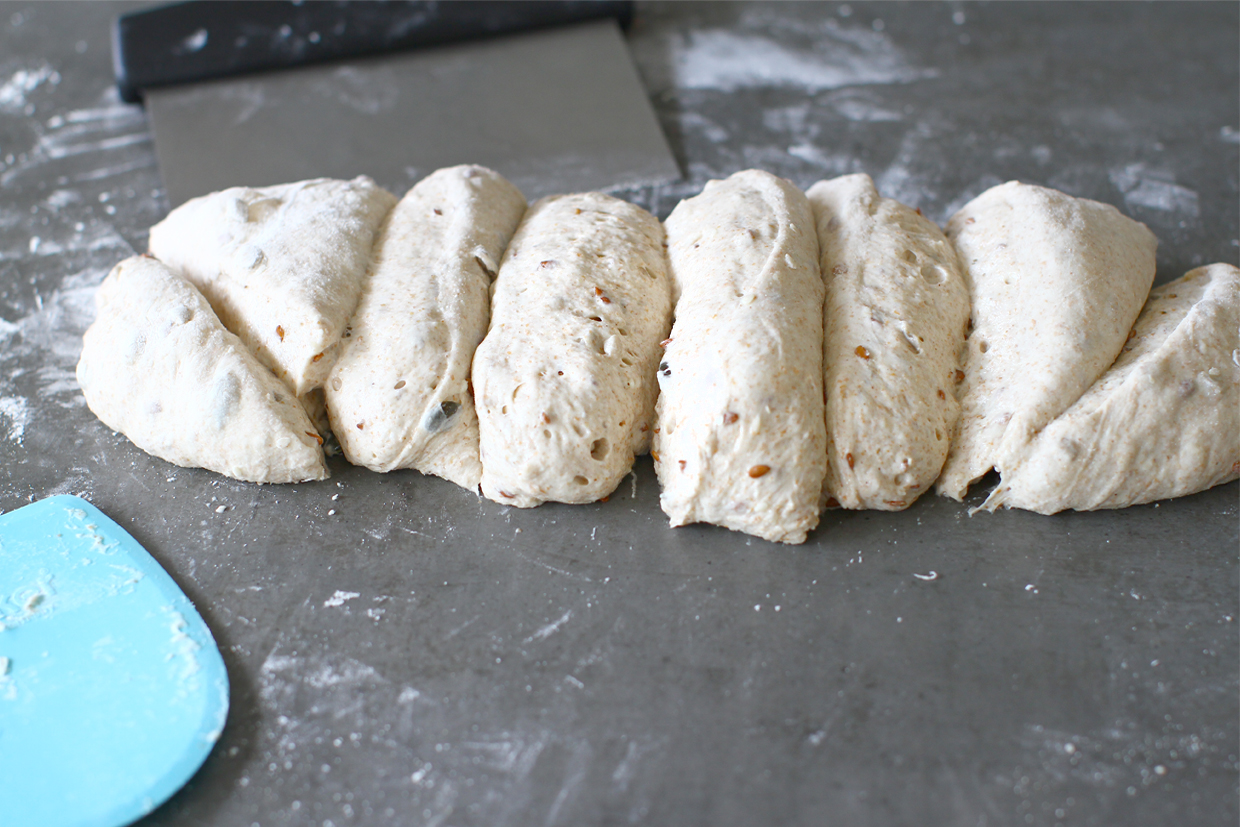
15. I prepared a tray (the oven’s tray), lining it with a sheet of baking paper. I sprinkled again some corn starch on the “loaf” of bread dough without kneading and then I divided it, with a pastry cutter, into 8 equal pieces.
16. One by one, I shaped the buns. On the work surface sprinkled with flour/starch, I transferred each piece of dough.
17. I gathered the dough’s edges all around, then pressed them to make them stick together in the middle.

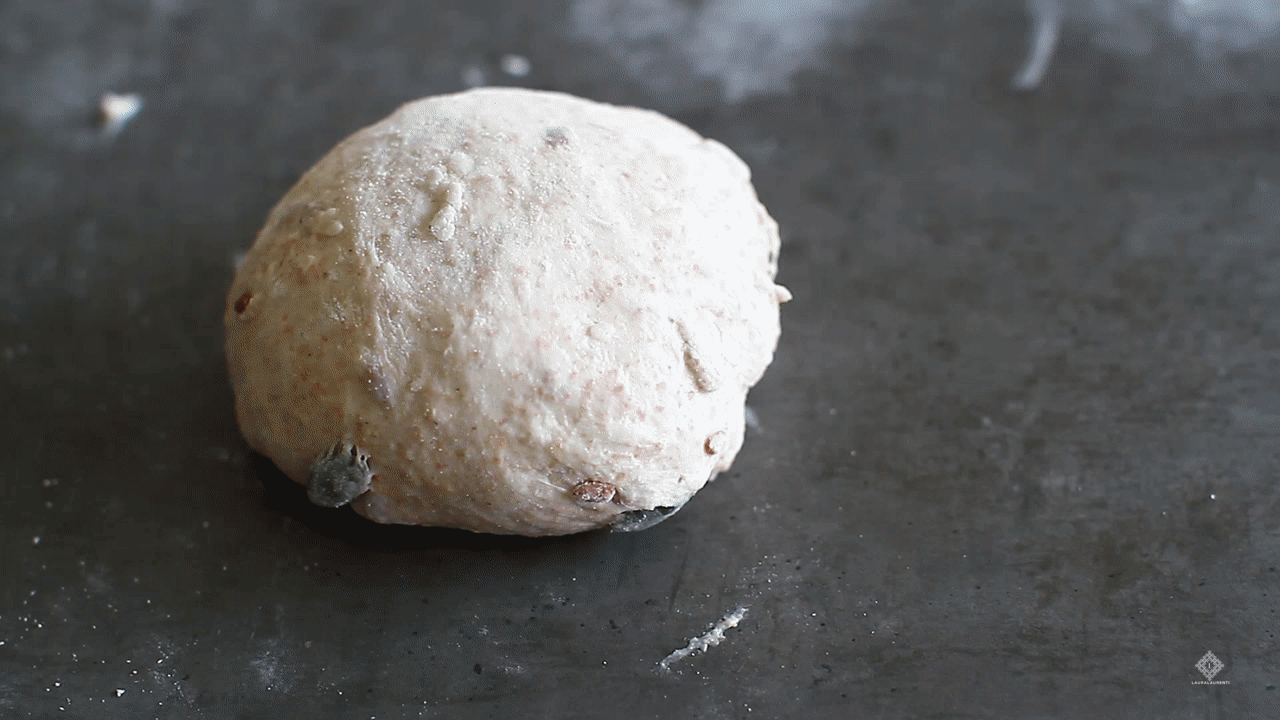
18. I obtained a rounded shape, already similar to those buns I want. Immediately, with the help of the scraper, I lifted the pre-molded bun and transferred it to a portion of the work surface without flour/starch on it.
19. I covered the rounded piece of dough with my palm. Without applying too much pressure, I rotated it on the work surface until it was nicely rounded and the base was sealed well. The animation below clearly shows the procedure.
20. As each bun went through steps 16-19, I placed it, immediately after modeling, in the tray covered with baking paper. I covered the tray with clean, double-layer kitchen towels and let the buns rise for another 40 minutes. Meanwhile, I turned on the oven and set it at 210 ° C, bottom and top heat, no ventilation.

The Baking
21. Before baking, I boiled about 250 ml. of water, in a saucepan, and I placed it in the preheated oven at 210 ° C, at its base. The steam in the oven will help a lot to get buns with a reddish, slightly crispy crust and a fluffy core. Before baking, my buns grew visibly. I moistened their surface with a little warm water and baked them at a medium height.

22. After 15 minutes, I removed the pan with water from the oven. Be careful to use gloves and be careful not to burn yourself! I continued to bake the bread buns, at the same temperature of 210 ° C, until they were nicely browned. I kept them in the oven for 40 minutes, because I like them brown and crunchy, if you like them more blonde, 35 minutes would be enough. As soon as I took the golden-brown crusted buns out of the oven, I sprinkled them with a little water, which gave them a nice shine on the surface.

23. After sprinkling, I transferred the no-knead bread buns with seeds to a wire rack to cool well.

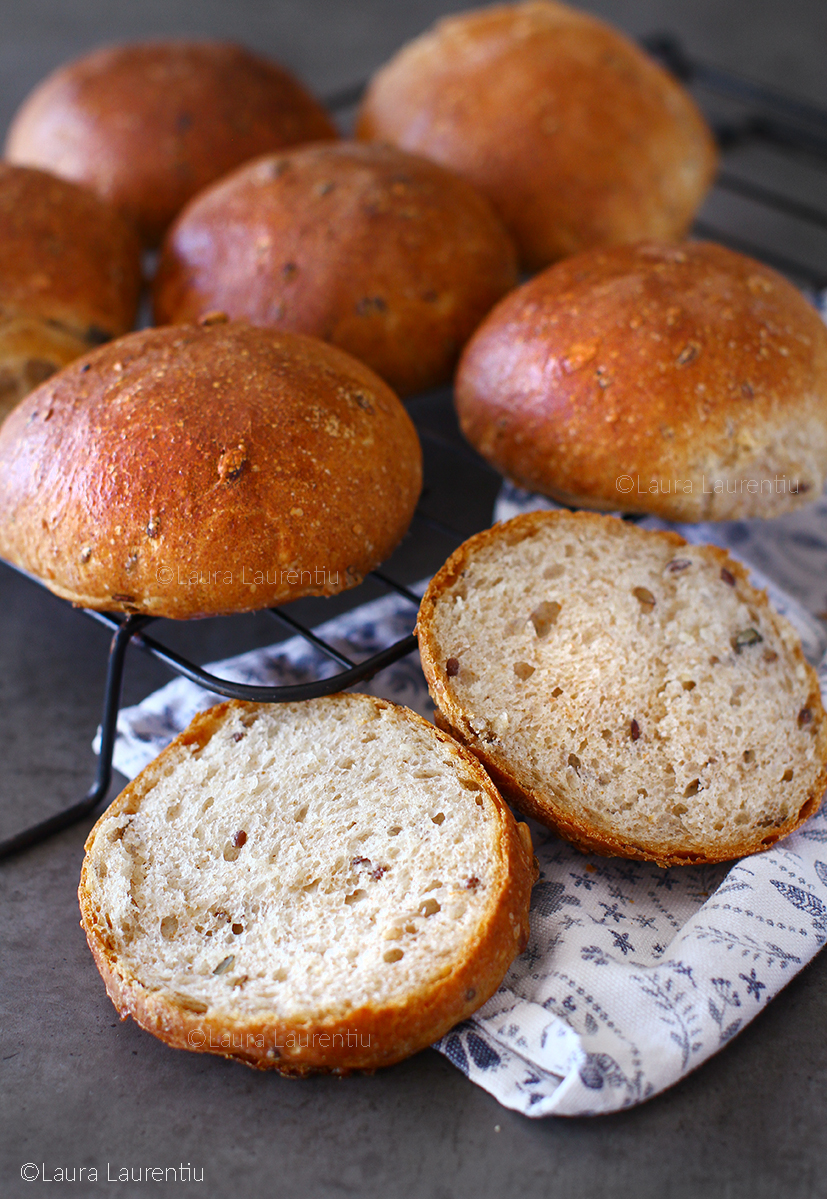
24. I opened one after it had completely cooled. These no-knead bread buns with seeds and whole wheat flour have a fluffy and appetizing crumb, as seen in the picture below, and the seeds are visible (and especially felt). I’m just sorry that I can’t convey their scent and taste through these photographs!
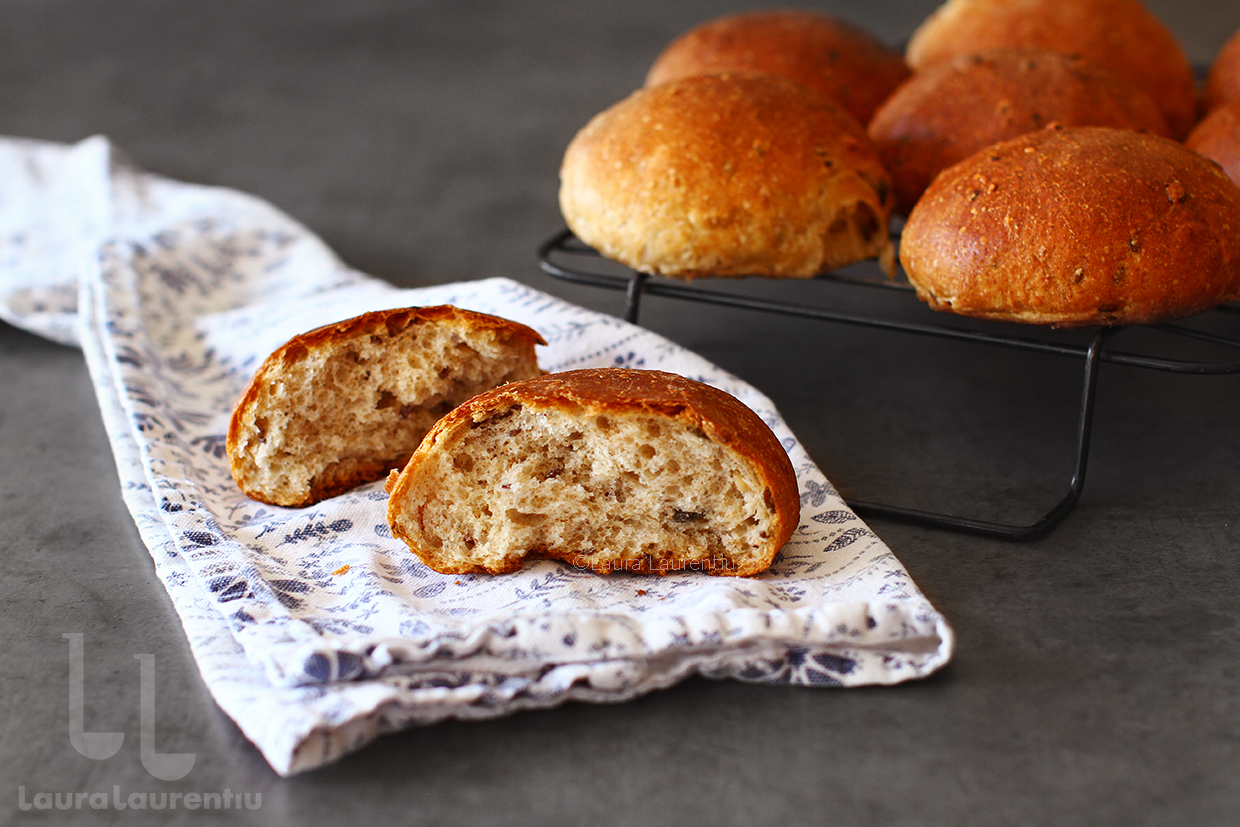
The no-knead bread buns with seeds are so delicious warm, with a little butter and salt on top! They’re also great for sandwiches because they taste great and have a nice texture! Furthermore, they are quite easy to make. It doesn’t take us too much time in the kitchen. We can, of course, sleep in our warm and comfortable place while the dough is also “sleeping” in the fridge. Hope you’ll like them!


